If you want you can just place the elements for your animation on a plain white background. Then you can skip this step – or add a background later whenever you choose to. Otherwise you can define a background color or use a picture for your background.
The background encloses the entire canvas
While the viewport has the dimensions of a slide (the first slide, by default), the background fills and even extends beyond the entire canvas. It is shown behind the slides as they are animated by moving the canvas to display the next slide inside the display window in the browser.
When you use an image as a background you need to choose one with quite large dimensions because the background needs to be larger than the borders of the canvas defined by the slides in your Xplain. If it wasn't that big you would see the edges of the image inside the window when the canvas is moved between the slides during the animation, and particularly when it is rotated.
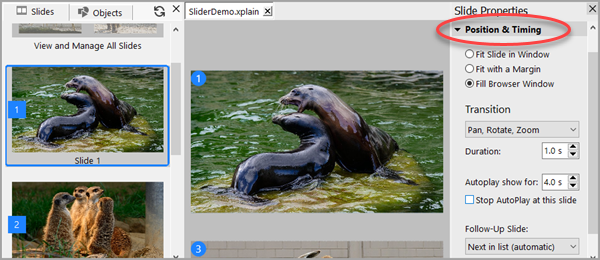
The background image can be defined with a vertical distance for the canvas to create a 3D effect while panning and zooming. You can configure this with the setting in the pane on the right.
Define a plain background color on the canvas:

This is the simplest option. It just makes the entire background a specific color. This color fills the entire workspace, not just the canvas.
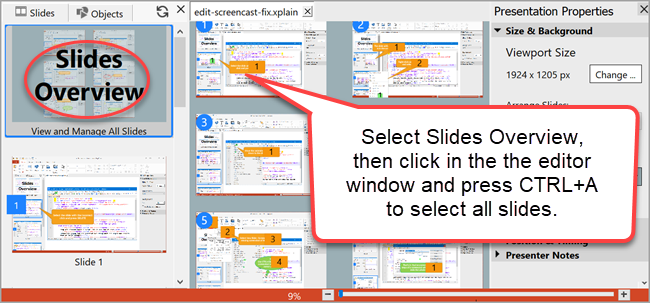
1.Select in the list on the left .
2.Open the section in the pane on the right and choose a background color Color: option.
Use a background image
Selecting a background image puts an image of your choice as a background on the bottom layer of the infographic. You can define the background image to have a virtual distance between itself and the slides and their contents. This gives a 3D effect when panning and zooming.
1.Select in the list on the left.
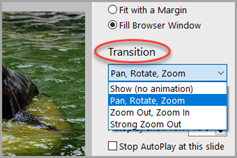
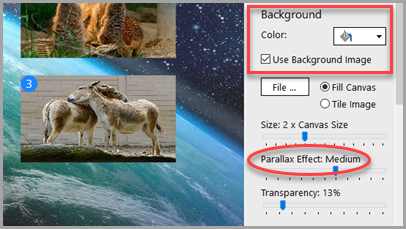
2.Open the section in the pane on the right, activate the Background Image option and choose an image file to use.
Background size
•The background needs to be larger than the canvas to prevent empty areas appearing during panning, rotating and zooming. Around 2.5X the size of the canvas is usually good value.
•The background image should be quite large so that it looks OK when zooming in on it.
Parallax Effect: 3D background effect
The setting creates a virtual distance between the background and the slides in your Xplain, resulting in a dimensional depth effect on moving between the slides. Increasing the parallax effect level increases the intensity of the 3D effect.
Background example with medium parallax effect Background image export format and size
The background image is always exported as a JPEG, and will be converted if necessary. This is required for Apple iOS devices, which place limits on the size of other image formats. This is also the only image in your Xplain that will always be exported in its full original resolution. All other images will be resized automatically when you publish the Xplain, if necessary.
|